
This week’s bake is inspired by my cousin Erin. We recently met through one of those DNA tests, 23 and me. Her mom and my mom grew up together and lost contact years ago, but through the magic of technology and science, she and I connected.We immediately hit it off and have quickly become great friends. Because I was so inspired by my new cousin who feels like an old friend, this week we’re adding a new take on an old favorite, Chocolate Baklava!
Baklava is one of my favorite bakes to make and since I was making this batch for Erin (who just had twin boys!) I knew I wanted it to be an amazing treat this new momma would love. This recipe is just as easy as my original Baklava recipe with a little added Nutella that gives it a new delicious flavor. Below is the recipe along with my tips and tricks and don’ts that I did. (side note, my baklava connoisseur loved this one too) Enjoy!
Ingredients for Honey Sauce
1 cup of water
1 cup of sugar
1 and 1/2 cups of honey
2 tablespoons of vanilla extract
1 tablespoon of cinnamon
Directions for Honey Sauce
Add water and sugar to medium-sized pot and bring to a boil.
Stir until sugar has completely dissolved.
Turn heat down to medium and add honey slowly while stirring.
Add vanilla extract and cinnamon
Continue to simmer for 20 minutes stirring occasionally.
Remove from heat and let cool.
Ingredients for Nut Mixture
6 ounces of finely chopped walnuts
6 ounces of finely chopped pistachios
6 ounces of finely chopped pecans
6 ounces of finely chopped hazelnuts
1 teaspoon ground cinnamon
1 teaspoon sugar
Directions for Baklava
1 package (16 ounces) of filo dough
1/2 cup of Nutella (melted in the microwave for 25-30 seconds)
Preheat oven to 350 degrees.
Add chopped nuts, cinnamon, and sugar to a bowl, mix, and set aside.
Melt butter in microwave.
Using a pastry brush, brush the butter on to a 9×13 in baking dish.
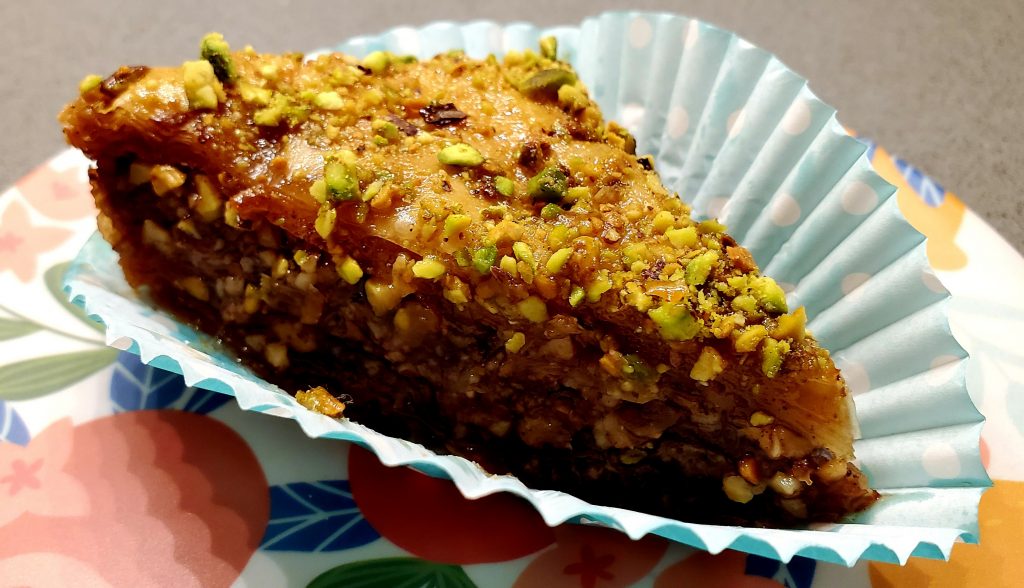
Add one sheet of filo and brush dough with a thin layer of butter. Repeat this step until you have layered 10 sheets of filo.
Brush Nutella on top of filo after the butter.
Add 3/4 cup of the nut mixture to the pan of filo.
Add five sheets of filo to the pan buttering in between each layer of dough.
Repeat the two steps above 3 more times.
Add 10 sheets of filo, buttering in between each layer and butter the top.
Here’s a breakdown of the order for the Baklava
- 10 buttered sheets of filo, Nutella, 3/4 cup nut mixture
- 5 buttered sheets of filo, Nutella, 3/4 cup nut mixture
- 5 buttered sheets of filo, Nutella, 3/4 cup nut mixture
- 5 buttered sheets of filo, Nutella 3/4 cup nut mixture
- 5 buttered sheets of filo, Nutella 3/4 cup nut mixture
- 10 buttered sheets of filo, butter top of pastry
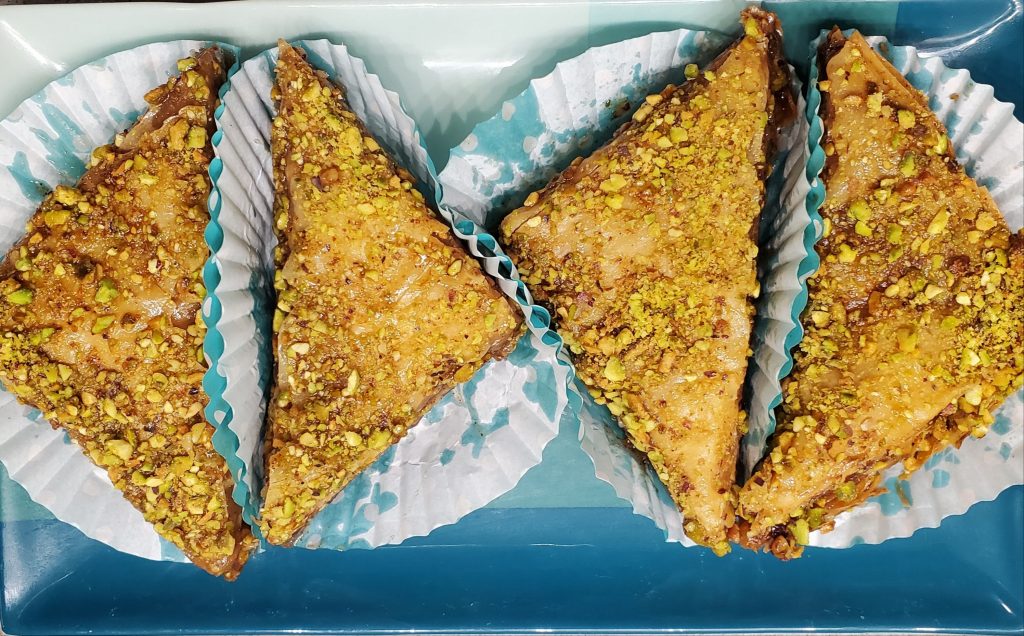
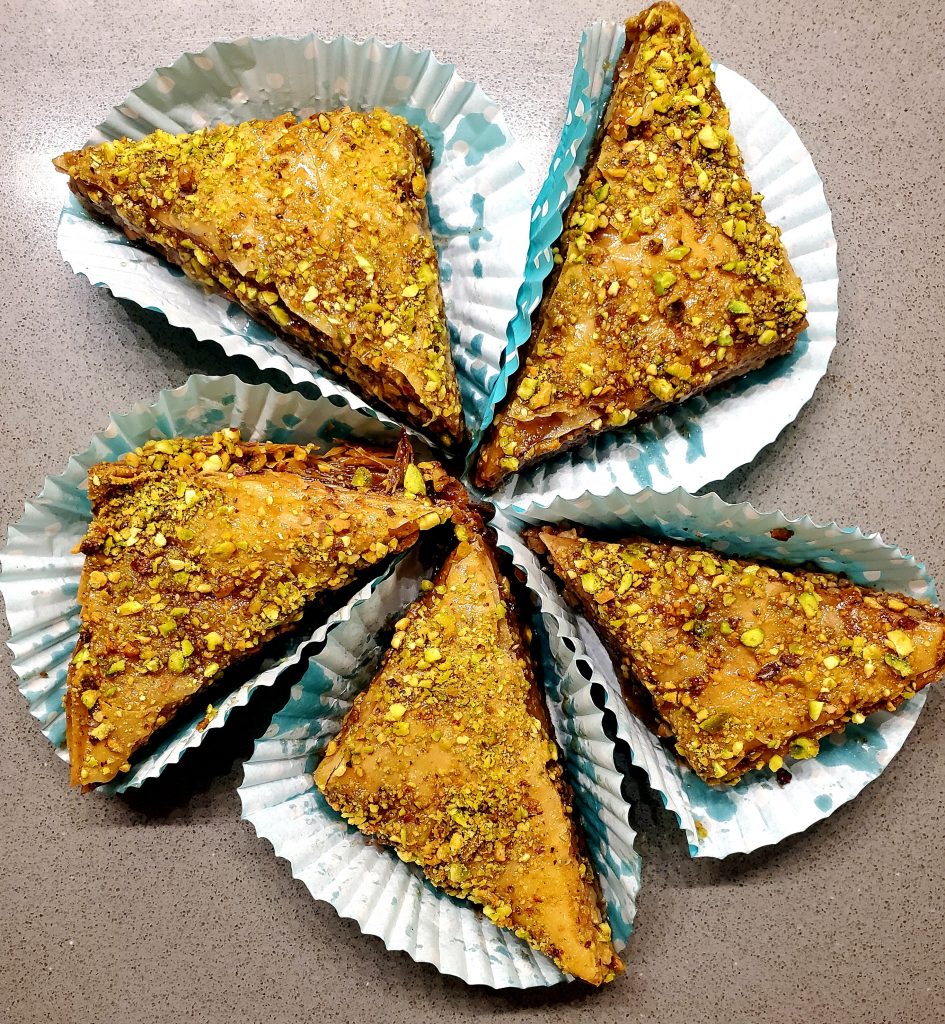
Using a sharp knife, cut the pastry into squares and then the squares into triangles.
Bake baklava for 50 minutes or until golden brown and crisp on top.
Remove from the oven and immediately pour the sauce over the entire pan.
Sprinkle remaining nut mixture over the top of the baklava.
Let sit and cool for a few hours before serving.
Tips and Tricks and a few Don’ts that I did
Make your honey sauce before you start building your baklava, giving it enough time to cool before adding it to the bake.
Don’t worry if your sauce is a little runny. It will thicken as it cools.
Filo dough is very very fragile. I recommend covering the dough with damp paper towels in between uses. Don’t worry if some of the filo tears during layering. You won’t be able to see it when the bake is complete.
Keep your butter hot. I melted mine in a microwavable safe bowl, boiled some water, and set the bowl in the hot water while I put together my baklava.
Be careful not to overheat your Nutella. You only need to heat enough to make it spreadable so can be brushed on the filo without tearing it. About 25-30 seconds is plenty.
When cutting the pastry, try not to cut the bottom few layers. This will help hold the sauce and allow it to soak more into the pastry.
Make sure you listen for the crackle when pouring the sauce over the Baklava. The crackle lets you know you’ve made a perfect baklava!
This bake is best after it sits for at least 3 hours and even better the next day. This gives the pastry enough time to absorb the sauce. The longer it sits, the better it tastes!
Baklava can be stored in the refrigerator or freezer and enjoyed later, but it’s best served at room temperature within a few days.