Mae Bakes is evolving! I’m adding to my baking blogs and incorporating some of my other passions into Mae Bakes. From travel to kids’ parties, hidden gem restaurants to hikes around Austin, and everything in between. Continue reading for some pics to give you a taste of what’s to come.
River Place Nature Trail
Infamous Brewery
Jacob’s Well
Sculpture Falls
Jester King Brewery
St Edward’s Park
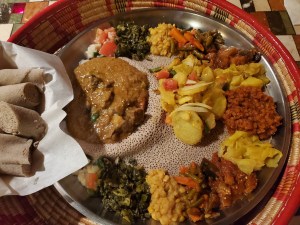
Taste of Ethiopia
Lonestar River Boat Bat Tours
City Lake Park
River Place Nature Trail
Brushy Creek Park
McKinney Falls State Park
Barton Creek Greenbelt
River Place Nature Trail
T-Locs Sonora Dogs
Be sure to subscribe below to get the latest blogs right to your email! Enjoy!
Confession… I haven’t baked since Christmas except for three birthday cakes for three very special people. I spent several months during the holidays focused on baking holiday treats and I needed some time to reset and refocus on healthy eating. I love baking so much, and I’m good at it, like really good, but I’m also an avid gym goer and very conscious about the amount of sugar and gluten I put in my body. Those two things don’t exactly mesh (real talk “healthy baking” is never as good as sugary floury baking) so I took a small break from the baking world.
During my brief baking hiatus, I didn’t realize how much I missed baking until my cousin’s husband reached out and asked me to bake a very special treat for my cousin’s 40th birthday bash. Her favorite flavor is mint. He sent me an idea for a vanilla mint chiffon cake, and I ran with it. I wanted this cake to be perfect for my cousin, Haley (also the 20+ people I had never met before, no pressure!). So I baked this cake, tweaked this cake, and ate this cake at least 3 or 4 different times before my taste tester and I crowned the recipe below the winner. Baking this cake not only relit my baking fire, but it created the most delicious, light, spongy, and minty chiffon cake you’ll ever bake and eat! Below you’ll find the recipe along with my tips, tricks, and don’ts that I did. Enjoy!
Mint Chiffon Cake with Mint Infused Icing
Ingredients
Chiffon Cake
2 bunches (or 1 packet) fresh mint, leaves picked
¾ cup whole milk
2 ¼ cups plain flour
1 ½ cups extra fine granulated sugar
1 tsp baking powder
pinch of salt
8 large egg whites
7 large egg yolks
1/3 cup grapeseed oil
2 tablespoons vanilla bean paste
Icing
2 cups powdered sugar
1/4 cup heavy cream
1 bunch (or 1/2 packet) fresh mint, leaves picked (use the other half of the mint packet for cake decoration)
Directions for Cake
Preheat oven 350 degrees. Combine fresh mint leaves and milk together in a saucepan and heat slowly until simmering. Turn off the heat and leave to cool completely to room temperature. Once cool, strain out the mint leaves ensuring you squeeze the leaves to release all the flavor.
In a medium bowl, sift together flour, half the sugar, baking powder and salt. In another medium bowl, whisk the egg yolks, oil, mint flavored milk, and vanilla bean paste until smooth. Slowly stir in the flour mixture until smooth, the batter will be thick. Set aside.
In a large bowl, or a stand mixer fitted with the whisk attachment, whisk the egg whites to soft peaks. Continue whisking and slowly stream in the remaining sugar until stiff shiny peaks form. Stir one third of the egg whites briskly into the egg yolk-flour mixture. Then gently fold through the remaining egg whites. The mixture should be light and foamy.
Scrape into a large, un-greased tube pan. Bake on the lowest oven rack for 60 minutes, or until springing back when lightly pressed. Check the cake at 30 minutes and if the top is browning or cracking, oil a piece of foil and cover the top of the cake.
Remove cake from oven and turn the pan upside down immediately (the cake should stick to the pan) and leave to cool completely – this helps the cake keep it’s shape. When the cake is completely cool, run a knife around the edge of the cake to loosen it, and turn it out.
Directions – Icing
Combine fresh mint leaves and heavy cream together in a saucepan and heat slowly until simmering. Turn off the heat and leave to cool completely to room temperature. Once cool, strain out the mint leaves ensuring you squeeze the leaves to release all the flavor.
Whisk together powdered sugar and infused heavy cream to form medium or thick icing. Pour over the top, letting it drip down the sides. Decorate with mint leaves and edible flowers.
Mint Infused Icing Drip
Tips and Tricks and Don’ts That I Did
Don’t use skim milk with this recipe. WHOLE milk is necessary to infuse the mint. I used skim milk the first time, and the cake had zero mint flavor. ZERO.
Make sure you slowly bring the milk to a simmer. Don’t burn your milk or heat it too fast. The mint needs to simmer for it to soak up that minty flavor. You’ll know it’s done when the milk has a light green tint to it.
Don’t skimp on squeezing the mint. Most of the flavor in the mint is still there after steeping in the milk. Squeeze Squeeze Squeeze until there is not one drop of liquid left in those leaves.
Sift all your dry ingredients. This will prevent clumps in your batter and icing.
Folding egg whites is a lot harder than it sounds, but they must be incorporated slowly and carefully into the batter. If you’re too fast, you won’t get the light airy batter that makes it the chiffon.
Don’t forget to check your cake halfway through the bake. If the top is browning add a piece of foil over the top.
Don’t spray your cake pan. It will stick, but that’s part of this bake. It easily comes out when a knife slides around the edge.
Be sure to let your cake cool completely before trying to remove it from the pan. I didn’t give the first couple of cakes time to cool, and they were a pain to remove from the pan. The last few I let sit on the counter for an hour or longer and they came right out.
Icing… I tried it in what felt like a million different ways. I tried lemon icing (although delicious the lemon completely stole the show from the mint). I tried super thin, medium, and thick. The mint icing was the winner, and I went with a thicker icing for the party. Both the medium and thick icing worked great (add more sugar for a thicker icing and more cream for a thinner one), but make sure you go with mint or even a plain would be tasty.
Dripping icing is tricky. I’ve found the best way is to pour it all on top and drag it down a little with a butter knife where you want the drips. I used a tiny mixing bowl with a spout, but a measuring cup would work just as well.
Last but not least a little tip for myself. Keep baking. You love it. Don’t worry about the sugar and the gluten, that’s part of the fun. Cut a sliver to taste and share with hungry friends, family, and neighbors, but don’t ever stop baking. You enjoy it, baking is your creative outlet, it’s one of your happy places, it’s even at times therapeutic, and did I mention how good you are at it? If any of you bakers or bloggers or readers and eaters have tips on what to do with extra bakes, send them my way.
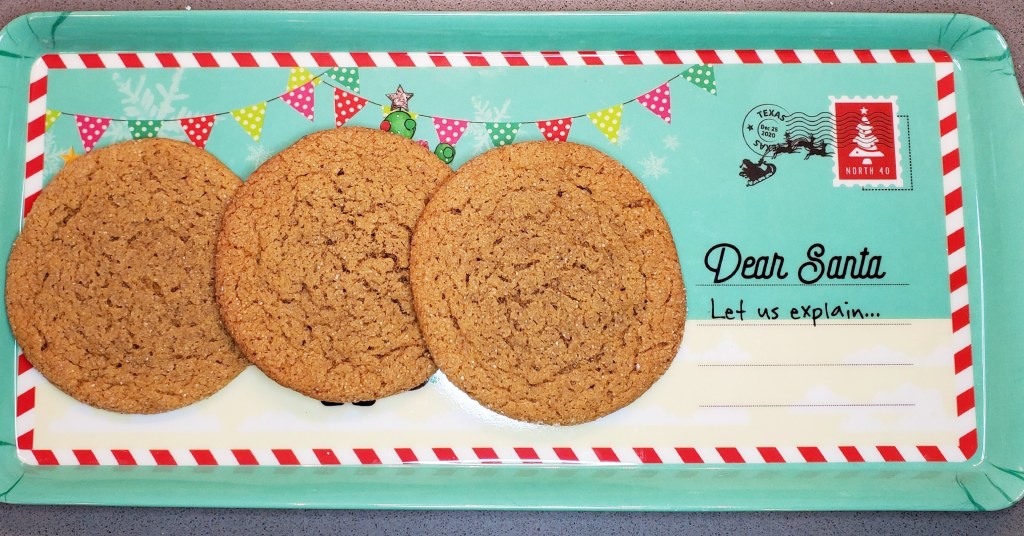
Christmas Cookie Season is in full swing and I have given in to baking all things round and delicious. Last weekend I decided to challenge myself and bake 12 different kinds of cookies. Baking 12 different kinds of cookies sounded like a great idea… until… I actually started baking. I spent a full Saturday in the kitchen and only baked 6 types. I do not consider the challenge a failure because the 6 kinds of cookies I did manage to bake turned out wonderful.
This week’s bake is the best of the cookie bunch and my favorite type of cookie; Ginger. I love ginger and I wanted to make sure this cookie had that sharp distinctive ginger flavor. Not only are they Ginger-ific, but they are soft too! This cookie ticks all the boxes on my list of cookie criteria. Below is my recipe for the softest and most delicious ginger cookie you’ll ever bake. Don’t forget to keep reading for my tips, tricks, and a few don’ts that I did. I’ll be posting the remaining 5 cookies this week too, so be sure to check back for more cookie recipes!
Ingredients
2 ¼ cups all-purpose flour
3 teaspoons ground ginger
1 teaspoon baking soda
1 teaspoon ground cinnamon
1/2 teaspoon ground cloves
1/4 teaspoon salt
3/4 cup margarine softened
1 cup white sugar
1 egg
1 tablespoon water
1/2 cup molasses
3 tablespoons white sugar
Directions
Preheat oven to 350 degrees.
Sift together the flour, ginger, baking soda, cinnamon, cloves, and salt. Set aside.
In a large bowl, cream together the margarine and 1 cup sugar until light and fluffy.
Beat in the egg, then stir in the water and molasses.
Gradually stir the sifted ingredients into the molasses mixture.
Shape dough into walnut-sized balls, and roll them in the remaining 3 tablespoons of sugar.
Place the cookies 2 inches apart onto an ungreased cookie sheet, and flatten slightly.
Bake for 10 minutes in the preheated oven.
Allow cookies to cool on baking sheet for 5 minutes before removing to a wire rack to cool completely.
Santa’s Favorite Ginger Cookie
Tips, Tricks, and a few Don’ts that I did
Don’t be afraid of ginger or molasses. I thought working with those ingredients was something out of my league, but honestly, these cookies are easier than plain ole chocolate chip.
Use a cookie scoop, but then roll them in between your hands to get them a perfectly round shape. I smooshed mine down just a little bit after rolling.
Don’t refrigerate the dough before baking. Unlike most cookies, these can go straight into the oven after you’ve placed them on the baking sheet.
Do save some for Santa! He’s sure to leave you lots of surprises after eating these delicious treats.
Spanakopita! A few months ago I visited a couple of different Greek restaurants where I had my first taste of the delicious flaky spinach and cheese pies called spanakopita. I love cheese and spinach so I had to learn how to make this at home. As always I researched my bake and put together what I think is the easiest and tastiest recipe. Don’t forget to keep reading to my tips, tricks, and a few don’ts that I did.
Ingredients
5 sheets of filo cut into 3 strip
1 package of frozen spinach squeezed and drained
4 ounces of feta cheese
1 tablespoon of flour
1/2 yellow onion chopped
2 tablespoons of fresh dill
2 eggs lightly beaten
3/4 melted butter
1/2 cup vegetable oil
Directions
Preheat oven to 350 degrees.
Heat oil in skillet on medium heat.
Slowly stir in onions and cook until softened.
Mix in flour, spinach and dill. Cook for 10 minutes until liquid is absorbed.
Remove from heat and let cool.
Mix in feta and eggs.
Lay filo flat and brush strips with melted butter.
Add 1 tsp of mixture onto fillo strip and fold into triangles.
Place filo triangle onto baking sheet and brush top with butter.
Repeat the above 3 steps steps for the remaining filo strips.
Bake triangles for 45 minutes or until golden brown.
Tips and Tricks and a Few Don’ts that I did
Be sure to cut a few extra strips of Filo. This type of dough is SUPER fragile. Be prepared to lose a few strips along the way.
After defrosting, draining, and squeezing your spinach it may seem like you won’t have enough for the bake. Don’t worry, that tiny ball of leafy goodness is plenty for this recipe.
Don’t forget to let your spinach and onion mixture cool before adding the eggs or you’ll risk getting an egg scramble.
I added the onion and dill for a little extra flavor in my pies, but you can leave them out or add more if you’d like.
Use damp paper towels to keep your filo moist in between folds.
Fold your filo strips like paper footballs. They won’t all be perfect and that’s okay. Keep folding and you’ll end up with the deliciousness in the picture below.
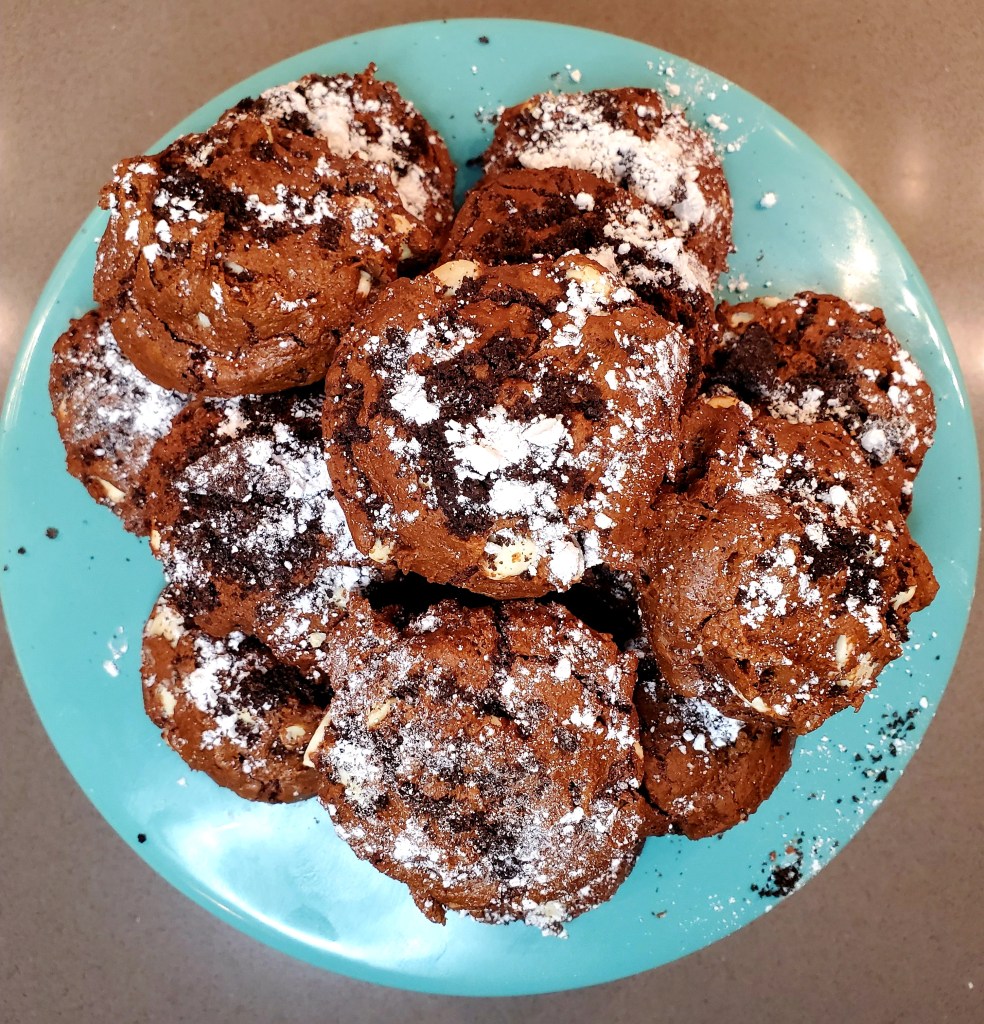
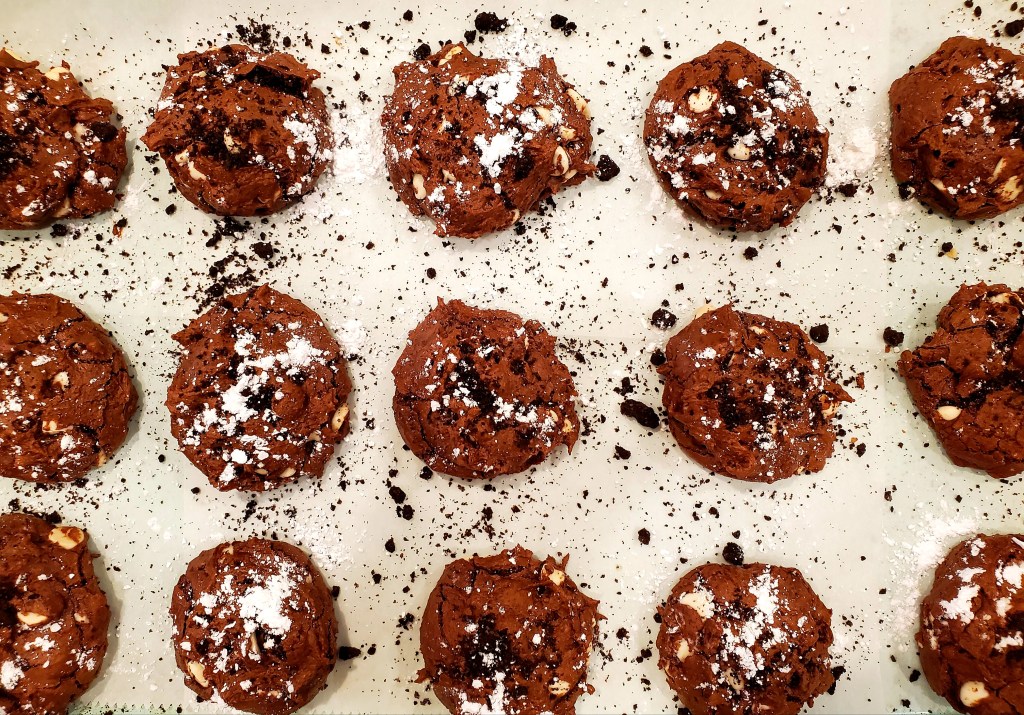
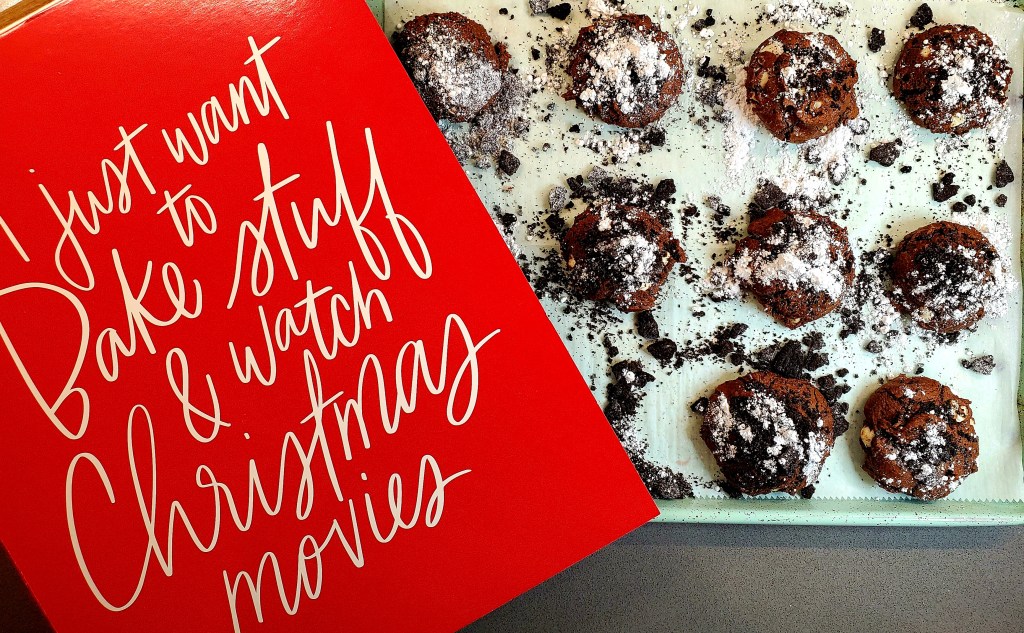
Holiday Cookie season is here! It’s a little earlier than usual, but it’s 2020 and we could all use a little joy, even if it’s 6 weeks early. My inspiration for this week’s bake comes from a few leftover goodies from Halloween. Below is the recipe for my Oreo Fudge Brownie Cookies along with my tips, tricks, and don’ts that I did. This is a cookie recipe you’ll want to make all year; they’re that good!
Oreo Fudge Brownie Cookies
Ingredients for Cookies
1 stick unsalted butter
1 package (12oz) of semi-sweet chocolate chips
4 eggs
1 cup of sugar
2 teaspoons of vanilla extract
1 cup Gluten-Free Flour
1/2 cup of unsweetened cocoa powder
1/2 teaspoon salt
1/2 teaspoon baking powder
1 package (12oz) of white chocolate chips
1.5 cups of crushed oreo wafers
1/4 cup powdered sugar (for topping the cookies)
Directions for Cookies
Heat oven to 350 degrees.
In a microwave-safe bowl, combine semi-sweet chocolate and unsalted butter. Microwave on high for 1.5 minutes or until the mixture is smooth when stirred. Set aside.
Mix eggs, sugar, and vanilla with hand mixer in large bowl until blended.
Add flour, baking powder, salt, and cocoa powder. Mix on low until well combined.
Blend in chocolate mixture.
Fold in 1 cup of the crushed Oreos.
Stir in white chocolate chips.
Drop a tablespoon or cookie scoop of mixture onto parchment-lined cookie sheet.
Bake for 15 minutes or until shiny.
Cool on cookie sheet for 2 minutes.
Move to cooling rack and top with remaining Oreos and powdered sugar.
Yuuum!!!
Tips, Tricks, and Don’ts that I did
Be careful not to overcook your chocolate chips in the microwave. The texture should be smooth, not grainy. If it’s grainy, you’ve heated them for too long and will need to redo it.
Oreos are not gluten-free. To limit the amount of gluten in my batch of cookies I used gluten-free flour. You can use regular flour if you’d prefer.
This cookie recipe would be great with nuts too. Feel free to play with the ingredients and add any extras you like.
These cookies should be fudgy, not dry. If they look underbaked, don’t worry! As long as you’ve baked them for the time listed in the instructions they’re done.
These cookies are delicious reheated too. Microwave for 5 seconds and add a dollop of vanilla ice cream or whipped cream on top.
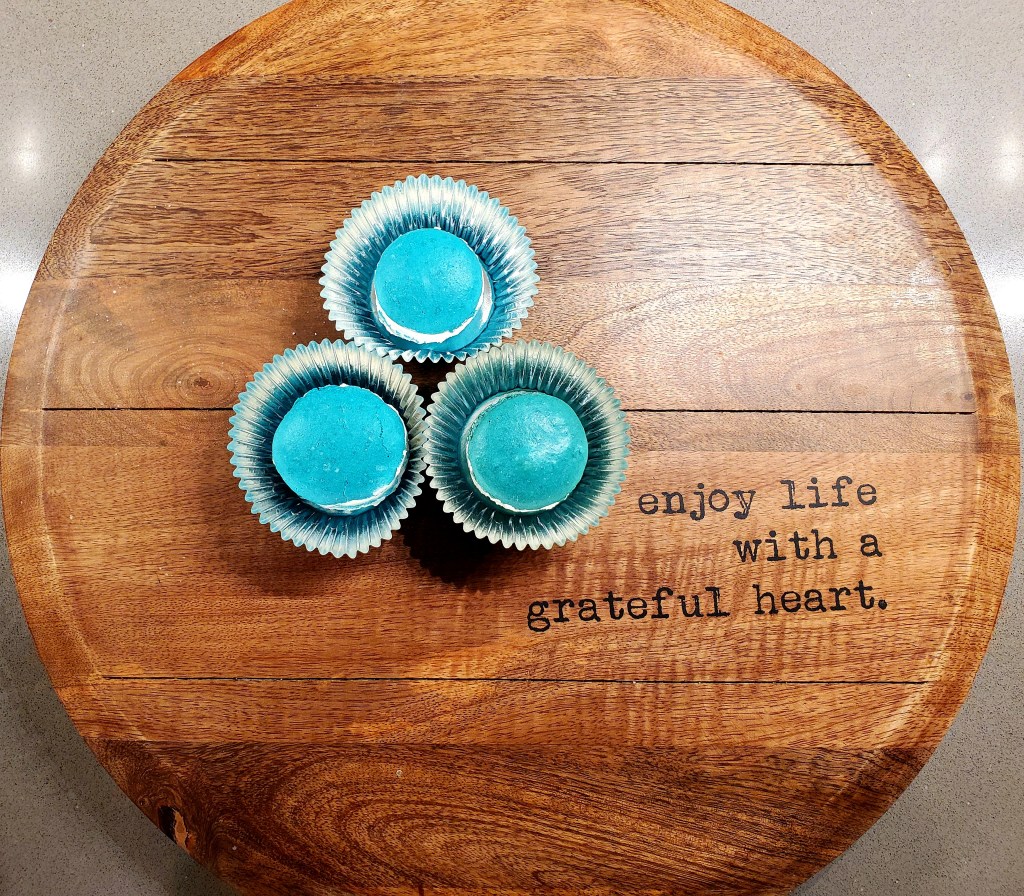
Ah, the Macaron. I’ve seen these colorful confections everywhere and eaten my fair share of them, but the thought of making macarons seemed too fancy for this new baker. Perfect circles? Bright colors? Light texture? Fluffy buttercream? My head was spinning. I could not stop thinking about these sweet treats and knew I needed to give them a try; I couldn’t believe how wrong I was. You don’t have to be an experienced pastry chef to make these delicate desserts. All you need some time and a little patience. It’s a bake I want to continue baking and perfecting. Below is my recipe for macarons along with my tips, tricks, and don’ts that I did.
Ingredients for Macarons
2 cups powdered sugar
1 cup almond flour, finely ground
1 teaspoon salt, divided
3 egg whites, at room temperature
¼ cup granulated sugar
1 teaspoon vanilla extract
3 drops teal gel food coloring
Ingredients for Vanilla Buttercream
1 cup unsalted butter, 2 sticks, at room temperature
3 cups powdered sugar
1 tablespoon vanilla extract
3 tablespoons heavy cream
Directions for Macarons
In the bowl of a food processor, combine the powdered sugar, almond flour, and ½ teaspoon of salt, and process on low until extra fine.
Sift the almond flour mixture through a fine-mesh sieve into a large bowl.
In a separate large bowl, beat the egg whites and the remaining ½ teaspoon of salt with an electric hand mixer until soft peaks form.
Gradually add the granulated sugar until fully incorporated. Continue to beat until stiff peaks form (you should be able to turn the bowl upside down without anything falling out).
Add the vanilla and beat until incorporated.
Add the food coloring and beat until just combined.
Add about ⅓ of the sifted almond flour mixture at a time to the beaten egg whites and use a spatula to gently fold until combined. After the last addition of almond flour, continue to fold slowly until the batter falls into ribbons.
Transfer the macaron batter into a piping bag fitted with a round tip.
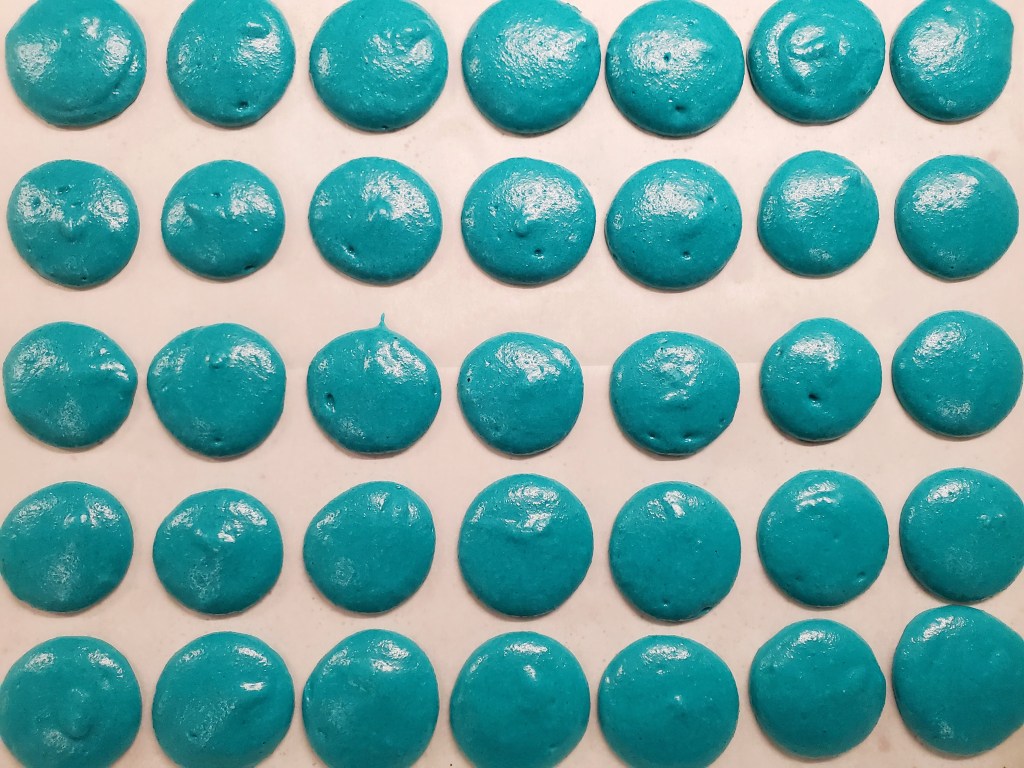
Pipe the macarons onto the parchment paper in 1.5-inch circles, spacing at least 1-inch apart.
Tap the baking sheet on a flat surface 5-6 times to release any air bubbles.
Let the macarons sit at room temperature for 1 hour, until dry to the touch.
Preheat the oven to 300˚F.
Bake the macarons for 20 minutes, until the feet are well-risen and the macarons don’t stick to the parchment paper.
Transfer the macarons to a wire rack to cool completely before filling.
Directions for Buttercream
In a large bowl, add the butter and beat with a mixer for 1 minute until light and fluffy.
Sift in the powdered sugar and beat until fully incorporated.
Add the vanilla and beat to combine.
Add the cream, 1 tablespoon at a time, and beat to combine, until desired consistency is reached.
Transfer the buttercream to a piping bag fitted with a round tip.
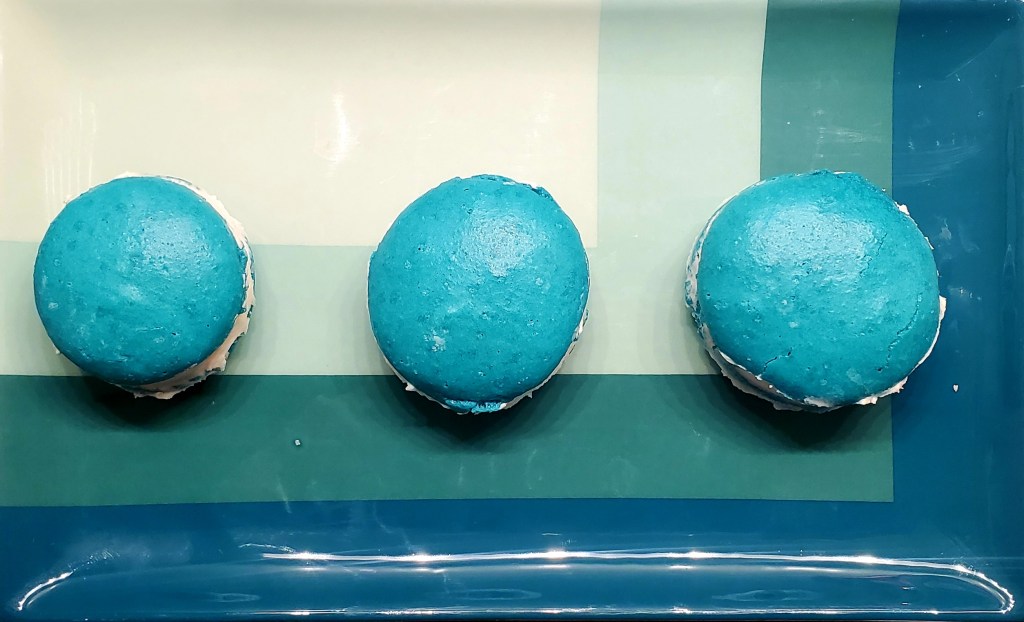
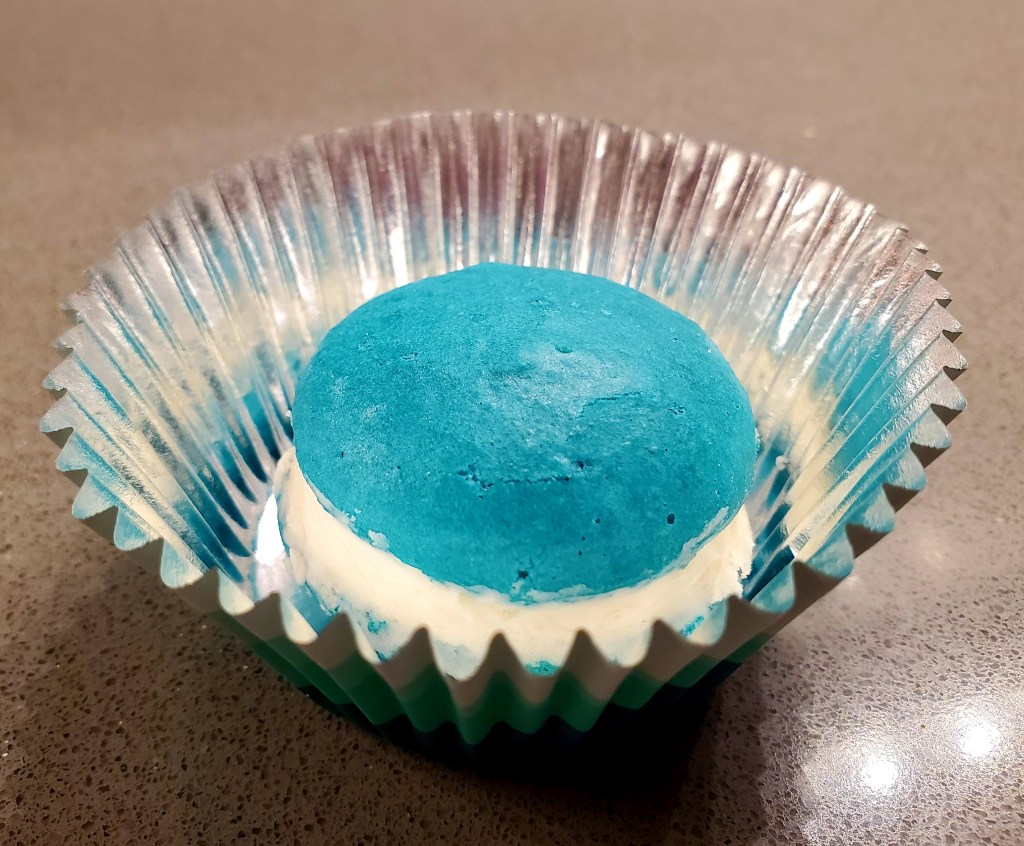
Add a dollop of buttercream to one macaron shell. Top it with another macaron shell to create a sandwich. Repeat with remaining macaron shells and buttercream.
Place in an airtight container for 24 hours before eating.
Tips, Tricks, and Don’ts that I did
Follow the recipe exactly. Step by step. Macaron batter can go south really quickly if it is not prepared correctly.
If you don’t have a food processor, don’t worry, but you’ll still need to move the flour and sugar through a fine-mesh sieve. The dry mixture needs to be free of clumps to get a smooth finish on the macarons.
Take your time with your folds and try not to be too aggressive when adding the dry mixture to the wet mixture. If you’re too fast you’ll run the risk of mixing out all of the air you just mixed in.
If you haven’t caught on, teal is my color, but you can play with any colors you’d like. Just be sure to use gel food coloring. Liquid color adds too much moisture to the batter.
When adding your batter or frosting to a piping bag, put the piping bag into a cup with the edges draped on the sides (I used a pint glass) and spoon the batter or frosting into the bag. I’m sure there are several ways to do this, but for me, this was the best one. (I can’t take credit for this tip, it was shared with me by a favorite and works like a charm)
It was really hard for me to get a perfect 1.5-inch circle for the macarons. I threw out my first batch and ended up downloading a 1.5-inch circle template. You can find a ton of free printable templates on Pinterest. I’ve also included a link here. https://www.pinterest.com/pin/25895766596923334/
Don’t rush. These bakes need time, time, and more time. I felt weird leaving them on the counter for an hour, but trust me they need every bit of the hour you give them. They’ll be oven-ready when the tops are dry.
Make sure your butter is at room temperature for your buttercream frosting. If it’s too cold you won’t get the smooth buttery texture we look forward to in a buttercream.
You can also play with filling flavors. I’m thinking of doing a lemon curd for my next batch. The possibilities are endless!
I’m a warm-weather summer girl through and through, except for October. As soon as the calendar hits October 1st I get a case of fall fever. I love the Halloween costumes, candy, and make-believe; give me all the spiders, witches, ghouls, ghosts, and goblins. I love spooky decorations, haunted houses, scary movies, and stories. I love football season (RTR! and GPG!) and the (slight) change in seasons, from 100 degree days to barely making it to the 90s (it’s Texas, we take what we can get). I love absolutely everything about fall.
A few weeks ago we were at our local grocery store when we spotted several giant white pumpkins. They were the coolest pumpkins I’d ever seen, but it was still September and fall fever hadn’t set in yet. I was still holding on to the last days of summer as tight as I could. On October 1st when my switch flipped from Summer to Fall the first thing I did was pick up one of those giant white pumpkins. This week’s bake is inspired by my love for fall and the discovery of the Polar Bear Pumpkin.
For this recipe, I wanted to try and make a healthy pumpkin pie. A healthy pumpkin pie is as rare as a unicorn, but this one is pretty close. It’s gluten-free and low sugar, but not lacking in delicious pumpkin pie flavor. One taste tester said “Happy Thanksgiving” right after his first bite! It’s perfect to share a slice with one of your favorites or you can eat three slices by yourself with very little guilt. Below is my recipe for Gluten-Free Maple Pumpkin Pie along with my tips and tricks and don’ts that I did. Enjoy!
Polar Bear Pumpkin (this week’s inspiration)
Ingredients for Gluten-Free Press in Crust
8 tablespoons of unsalted butter (1 stick), melted and cooled slightly
1 tablespoon of vegetable oil
1 teaspoon of ground cinnamon
1 teaspoon of brown sugar
1/4 teaspoon of fine salt
1 1/3 cups of gluten-free flour, plus more as needed
Ingredients for Filling
1 (15-ounce) can of pumpkin purée (not pie mix)
1 cup of heavy cream
1/2 cup of pure maple syrup
2 large eggs
1 tablespoon of ground cinnamon
1/4 teaspoon of ground ginger
1/4 teaspoon of ground nutmeg
3/4 teaspoon of fine salt
Ingredients for Streusel
1/4 cup of packed dark brown sugar
1/4 cup of gluten-free flour
1/3 cup of uncooked rolled oats (not instant)
1/4 teaspoon of ground cinnamon
1/4 teaspoon of ground ginger
1/8 teaspoon of ground nutmeg
1/4 teaspoon of fine salt
4 tablespoons of cold unsalted butter, cut into small pieces
Directions for Gluten-Free Press in Crust
Stir the butter, oil, sugar, cinnamon, and salt together in a medium bowl until evenly combined. Add the measured flour and stir until a soft dough forms.
Sprinkle the dough in small clumps over the bottom of a 9 1/2- to 10-inch deep-dish pie plate. Using a measuring cup or your fingers, evenly press the dough into the bottom and up the sides of the plate (flour the cup or your fingers occasionally to prevent sticking).
Cover with plastic wrap and chill in the refrigerator for at least 1 hour.
Arrange an oven rack in the lower third of the oven. Place a baking sheet on the rack and heat the oven to 375°F.
Make the filling
Directions for Filling and Baking
Place all of the filling ingredients in a large bowl and whisk until smooth and combined. Set aside until the crust is chilled.
When the crust is ready, pour the filling into it. Place the pie on the hot baking sheet and bake until the outer 2 inches of the pie are set, about an hour.
Meanwhile, make the streusel.
Directions for Streusel
Whisk everything except the butter in a medium bowl until combined. Add the butter and, using your fingers, squeeze the flour mixture and butter together until they form moist clumps and all of the flour is totally incorporated into the butter. Cover and place in the refrigerator.
After the pie has baked for 60 minutes, remove it from the oven and sprinkle evenly with the streusel topping, breaking up any large clumps with your fingers as you sprinkle.
Return the pie to the oven and bake until the streusel lightly browns and the filling is set, but still jiggles slightly in the center. About 40 minutes more.
Remove the pie from the oven to a wire rack and let cool completely before serving.
Gluten-Free Maple Pumpkin Pie with Cinnamon Oat Streusel
Tips and Tricks and Don’ts That I Did
This recipe makes a ton of filling and works best with a deep pie dish. I don’t have a one and ended up throwing some of the pie filling down the drain. Be sure to use a deep pie dish or be prepared to have left-over pie filling.
I was a little nervous about trying a press-in crust. Making crust is one of my favorite things to do in the kitchen, but I wanted to try something new. The press-in crust was much easier AND tastier than I thought it would be. I’ll be making it for other pies again soon.
Speaking of crust, gluten-free crusts are always a little more fragile than the traditional crust, especially the press-in kind. Don’t stress if your pie falls apart a bit when transferring it from pie dish to plate. It still tastes delicious.
Be prepared for lots of recipe requests. This pie is the definition of all the things to love about fall.
This pie can be stored in the refrigerator for up to 3 days, but I’m sure it won’t last that long.
All tricks aside, this pie is such a treat you’ll want to make two; one for yourself and one to share with friends and family.
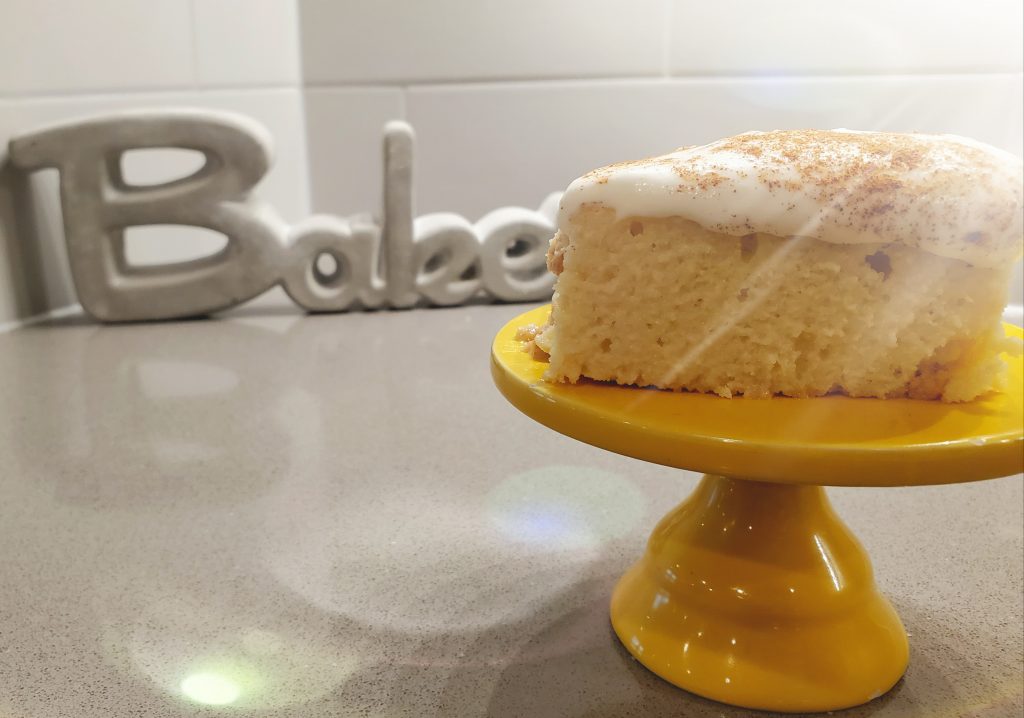
If you’ve been following my blog, you know most of my baking and blogging inspiration comes from trying new desserts at restaurants all over Austin TX. This week is no different, we’re baking a new favorite, Tres Leches Cake (Milk Cake). I’ve heard of tres leches cake, but didn’t know what it was and had never eaten it. Last weekend I got the chance to try it for the first time and OH MY GOODNESS… A cake soaked in milk… where has this been all my life?!?! It was delicious, sweet and the texture was unlike anything I had ever eaten before. Of course, I had to try and recreate it. Below is the recipe for my Tres Leches Cake along with my tips and tricks and don’ts that I did.
Mae Bakes Tres Leches Cake
Ingredients
1 1/2 cup of all-purpose flour
1 teaspoon baking powder
1 cup white sugar
5 large eggs
1 teaspoon vanilla extract
2 cups 1% milk
1 (14 ounce) can sweetened condensed milk
1 (12 fluid ounce) can evaporated milk
1 ½ cups heavy whipping cream
1 cup white sugar
1 tablespoon vanilla extract
1 tablespoon cinnamon
Directions
Preheat oven to 350 degrees F (175 degrees C). Grease and flour one 9×13 inch baking pan.
Combine flour and baking powder and set aside.
Cream butter and 1 cup of sugar together in a stand mixer until fluffy. Add eggs and 1 teaspoon vanilla extract; beat well.
Add the flour mixture to the butter mixture 2 tablespoons at a time; mix until well blended. Pour batter into prepared pan.
Bake at 350 degrees F (175 degrees C) for 30 minutes. Pierce cake several times with a fork.
Let cake cool in the pan for at least an hour.
Combine the whole milk, condensed milk, and evaporated milk together. Pour over the top of the cooled cake.
Whip whipping cream, 1 cup of sugar, and 1 tablespoon of vanilla together until thick. Spread over the top of the cake. Sprinkle with cinnamon. Let the cake sit in the refrigerator overnight and enjoy!
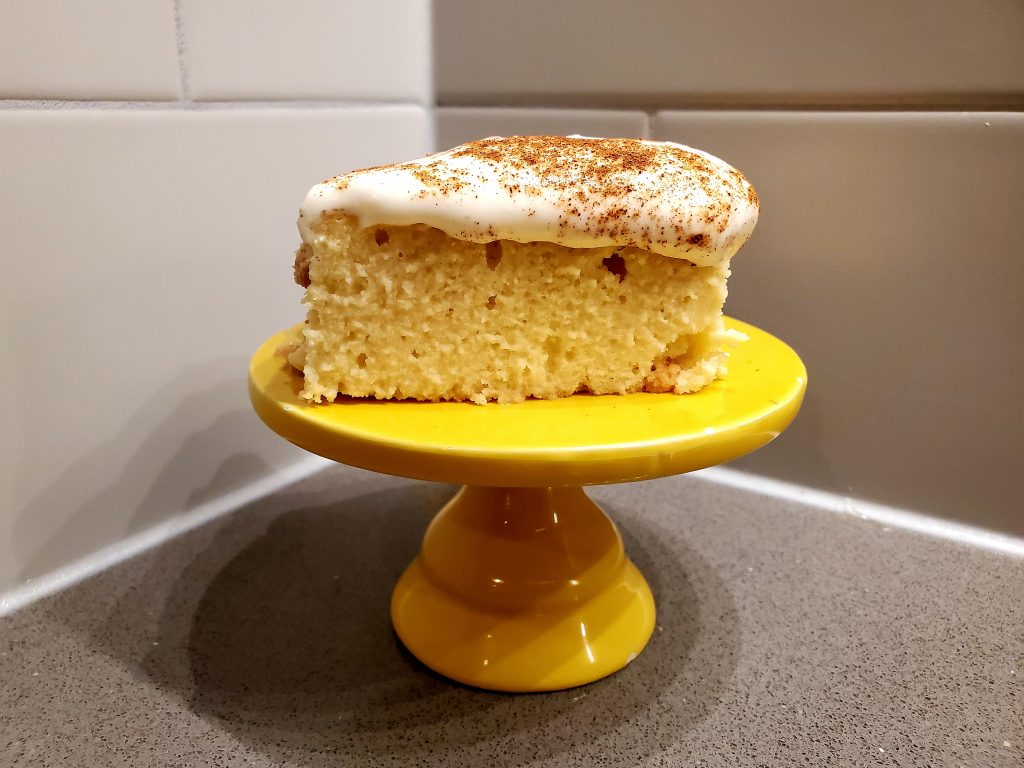
Tres Leches Cake with Cinnamon Whipped Cream Topping
Tips, Tricks, and Don’ts that I did
The batter will be thick. Don’t worry, it’s supposed to have a cookie batter-like consistency.
Don’t be weirded out by how the cake looks after it bakes. Once it soaks up the milk it will fluff up and turn into the delicious picture below. (I almost trashed mine because I was afraid I had overbaked it, don’t do what I almost did)
GIve the cake time to soak up the milk mixture before topping with the whipped cream.
I topped mine with cinnamon, but fruit like strawberries or blueberries would make great toppings too.
This cake is best served after a night in the refrigerator, but you can serve it after a few hours if you’re pressed for time.
“Every cake should be soaked in milk”- #1 Mae Bakes Taste Tester. Truer words have never been spoken 🙂 If you love milk, this cake is for you. It’s big enough to share or can be stored in the refrigerator for up to a week if you want to keep it to yourself!
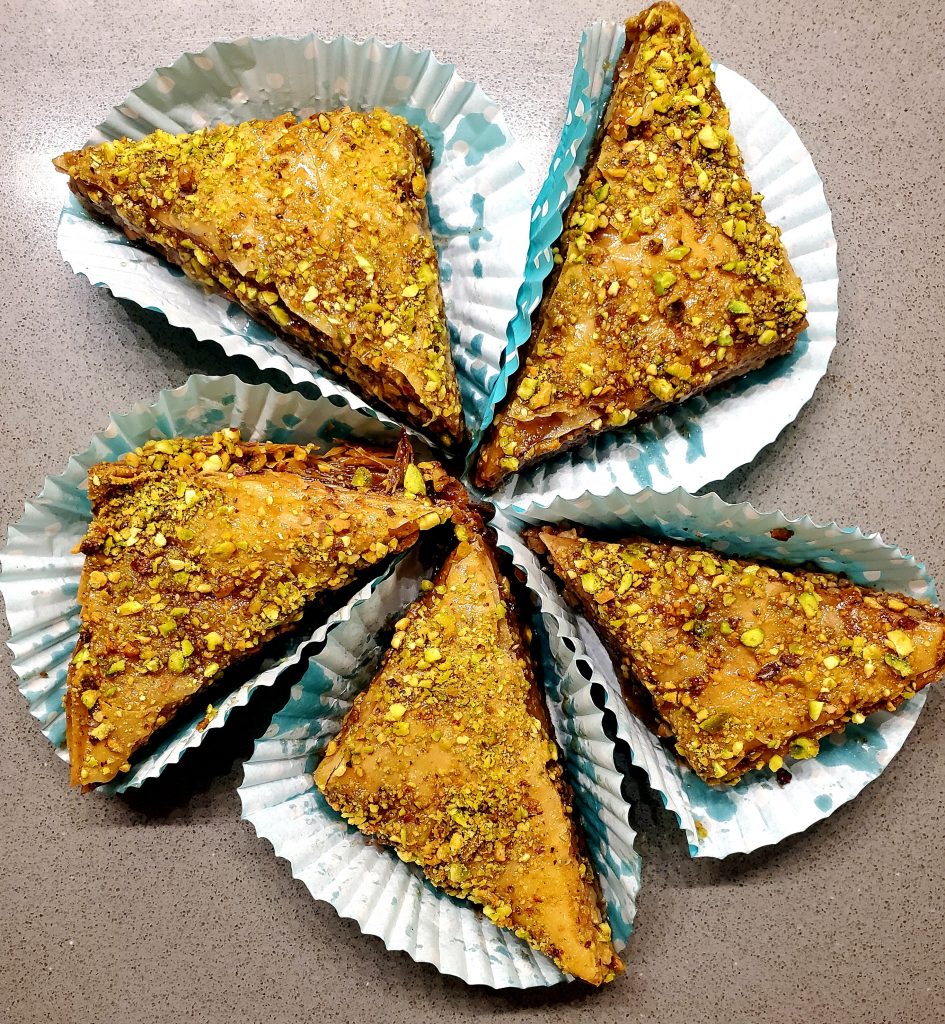
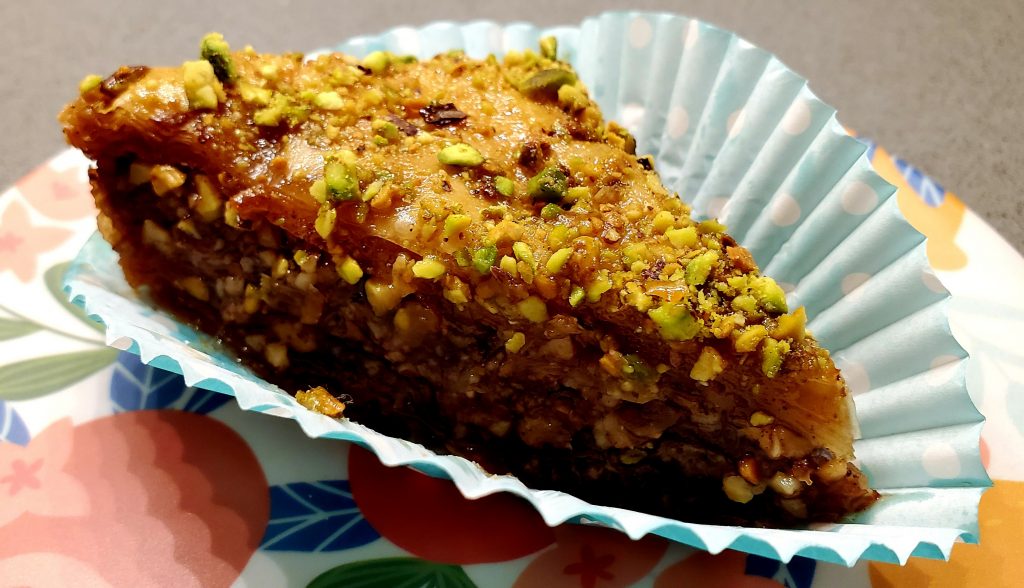
This week’s bake is inspired by my cousin Erin. We recently met through one of those DNA tests, 23 and me. Her mom and my mom grew up together and lost contact years ago, but through the magic of technology and science, she and I connected.We immediately hit it off and have quickly become great friends. Because I was so inspired by my new cousin who feels like an old friend, this week we’re adding a new take on an old favorite, Chocolate Baklava!
Baklava is one of my favorite bakes to make and since I was making this batch for Erin (who just had twin boys!) I knew I wanted it to be an amazing treat this new momma would love. This recipe is just as easy as my original Baklava recipe with a little added Nutella that gives it a new delicious flavor. Below is the recipe along with my tips and tricks and don’ts that I did. (side note, my baklava connoisseur loved this one too) Enjoy!
Ingredients for Honey Sauce
1 cup of water
1 cup of sugar
1 and 1/2 cups of honey
2 tablespoons of vanilla extract
1 tablespoon of cinnamon
Directions for Honey Sauce
Add water and sugar to medium-sized pot and bring to a boil.
Stir until sugar has completely dissolved.
Turn heat down to medium and add honey slowly while stirring.
Add vanilla extract and cinnamon
Continue to simmer for 20 minutes stirring occasionally.
Remove from heat and let cool.
Ingredients for Nut Mixture
6 ounces of finely chopped walnuts
6 ounces of finely chopped pistachios
6 ounces of finely chopped pecans
6 ounces of finely chopped hazelnuts
1 teaspoon ground cinnamon
1 teaspoon sugar
Directions for Baklava
1 package (16 ounces) of filo dough
1/2 cup of Nutella (melted in the microwave for 25-30 seconds)
Preheat oven to 350 degrees.
Add chopped nuts, cinnamon, and sugar to a bowl, mix, and set aside.
Melt butter in microwave.
Using a pastry brush, brush the butter on to a 9×13 in baking dish.
Add one sheet of filo and brush dough with a thin layer of butter. Repeat this step until you have layered 10 sheets of filo.
Brush Nutella on top of filo after the butter.
Add 3/4 cup of the nut mixture to the pan of filo.
Add five sheets of filo to the pan buttering in between each layer of dough.
Repeat the two steps above 3 more times.
Add 10 sheets of filo, buttering in between each layer and butter the top.
Here’s a breakdown of the order for the Baklava
10 buttered sheets of filo, Nutella, 3/4 cup nut mixture
5 buttered sheets of filo, Nutella, 3/4 cup nut mixture
5 buttered sheets of filo, Nutella, 3/4 cup nut mixture
5 buttered sheets of filo, Nutella 3/4 cup nut mixture
5 buttered sheets of filo, Nutella 3/4 cup nut mixture
10 buttered sheets of filo, butter top of pastry
Using a sharp knife, cut the pastry into squares and then the squares into triangles.
Bake baklava for 50 minutes or until golden brown and crisp on top.
Remove from the oven and immediately pour the sauce over the entire pan.
Sprinkle remaining nut mixture over the top of the baklava.
Let sit and cool for a few hours before serving.
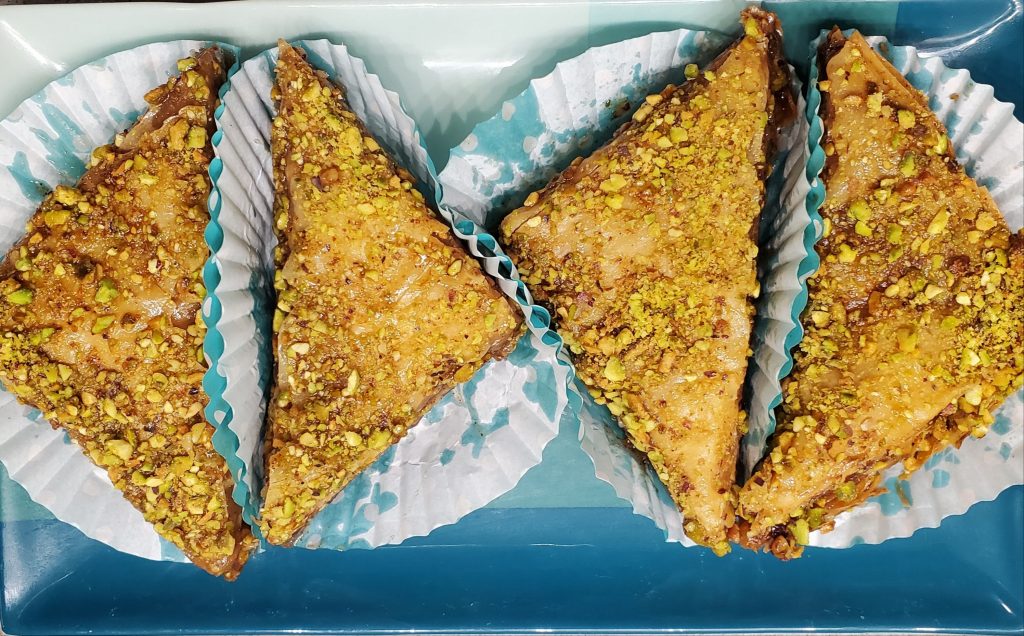
Chocolate Baklava
Tips and Tricks and a few Don’ts that I did
Make your honey sauce before you start building your baklava, giving it enough time to cool before adding it to the bake.
Don’t worry if your sauce is a little runny. It will thicken as it cools.
Filo dough is very very fragile. I recommend covering the dough with damp paper towels in between uses. Don’t worry if some of the filo tears during layering. You won’t be able to see it when the bake is complete.
Keep your butter hot. I melted mine in a microwavable safe bowl, boiled some water, and set the bowl in the hot water while I put together my baklava.
Be careful not to overheat your Nutella. You only need to heat enough to make it spreadable so can be brushed on the filo without tearing it. About 25-30 seconds is plenty.
When cutting the pastry, try not to cut the bottom few layers. This will help hold the sauce and allow it to soak more into the pastry.
Make sure you listen for the crackle when pouring the sauce over the Baklava. The crackle lets you know you’ve made a perfect baklava!
This bake is best after it sits for at least 3 hours and even better the next day. This gives the pastry enough time to absorb the sauce. The longer it sits, the better it tastes!
Baklava can be stored in the refrigerator or freezer and enjoyed later, but it’s best served at room temperature within a few days.
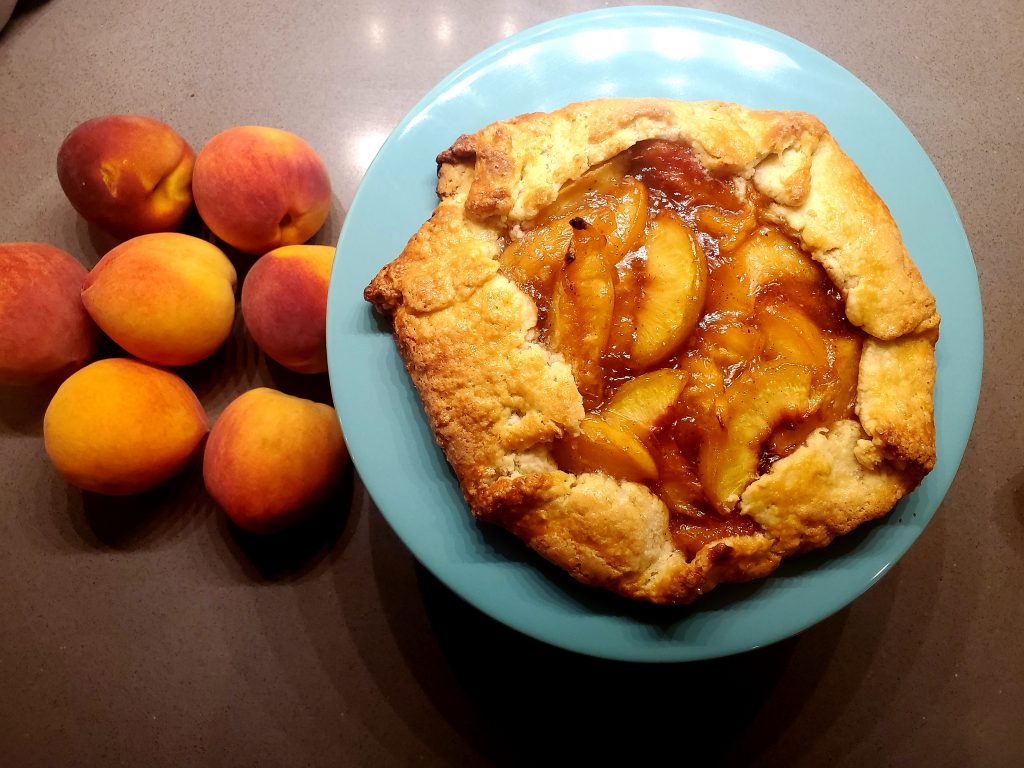
For this week’s bake, I wanted to do something fun and easy, but also on a personal level, I needed a bake that could be a little bit therapeutic. Baking is my therapy and my flaky crust is my therapist. I’m sure I’m not the only one out there feeling the feels, but with all of the chaos happening in the world, my anxiety has been out of control. This week’s bake is inspired by my need to find my way in the new out of (my) control world and the bakes that get me through it. An easy peach galette that is sure to make you feel good.
This bake is a little unconventional, but super tasty. The fun part of a galette is it does not have to be perfect. It’s more of a rustic pie with a hint of tasty tart. AND since it’s the middle of peach season in Texas I had to do one last peach bake. Below is the recipe for my easy peach galette along with my tips, tricks, and a few don’ts that I did. Enjoy!
Flaky Crust Ingredients
2 cups all-purpose flour
1 tablespoon granulated sugar
1 teaspoon salt
1 cup unsalted butter, cold and cubed
1 egg
2 tablespoons of milk
1 tablespoon of vanilla extract
Directions for Galette
In a large bowl, whisk together the flour, sugar, and salt.
Using a pastry blender, cut in the butter until it is the size of peas and the mixture holds together when you squeeze it.
In a small bowl, whisk together the egg, vanilla, and milk. Add to the dough. Mix together with a fork until everything is evenly moistened. Knead briefly on a floured surface.
Cover with plastic wrap and refrigerate for 30 minutes.
Divide the dough in half.
Roll out the dough halves in to 2 circles (they don’t have to be pretty)
Put on a baking sheet and refrigerate for another 30 minutes.
Ingredients and Directions for Pie Filling
4 cups of sliced peaches (about 5 medium peaches)
2 tablespoons of fresh lemon juice
2/3 cup of brown sugar
1 tablespoon of ground nutmeg
2 tablespoons of cornstarch
Combine all ingredients into a saucepan and cook on medium heat for 5-10 minutes.
Let cool for 20 minutes.
Putting it All Together
Preheat oven to 425
Pull dough out of the refrigerator.
Add peach mixture to the center of each circle, leaving about 2 inches around the edges.
Fold edges to the peach filling.
Whisk egg with 1 tablespoon of water and brush egg wash on the sides of the galette.
Sprinkle with sugar.
Bake at 425 for 25 minutes or until the galettes are golden brown.
Slice and Enjoy!
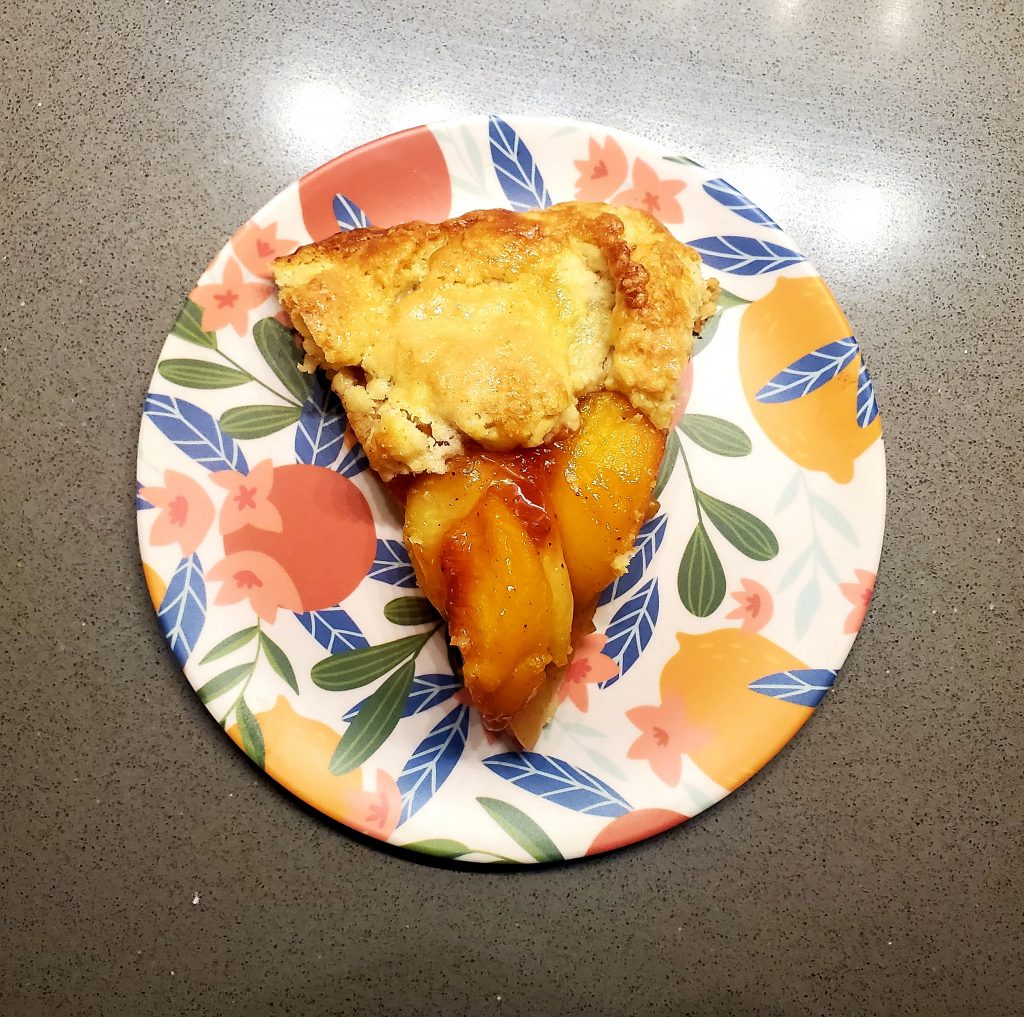
Sliced Peach Galette
Tips, Tricks and Don’ts that I did
I used peaches, but this recipe can be made with any fruit or combination of fruit you’d like. I made another one with strawberries and basil; it was divine!
If you use a fruit with a lot of water, be sure to add a little more cornstarch to soak up some of the extra moisture.
Don’t forget cold butter is key to this crust. If you feel your butter starting to melt while handling the dough, put it back in the refrigerator.
This recipe is very easy, but the dough can be made ahead of time and stored in the refrigerator if you need a little extra time.
Serve these warm with a little homemade whipped cream or at room temperature.