For my next bake I decided to make my kids most favorite breakfast dessert… DOUGHNUTS!
My first thought when I decided to make doughnuts was to make easy baked cake doughnuts. There are TONS of recipes out there and they all seem pretty simple, but I decided if I was going to learn how to make doughnuts I would do it the conventional (fried) way. That makes this technically not a bake, but a fried.
The scariest part of this recipe was not the frying, it was the yeast and the proving. I’ve watched too many baking shows to know that proving can go really wrong really fast. The directions on the yeast packet even gave me a little anxiety. I felt completely out of my element, but I powered through and quickly figured out that making these doughnuts was not as hard as I thought it would be. Below is the recipe for Glazed Doughnuts and Chocolate Covered Doughnuts along with Powered Sugared Doughnut Holes. I’ve also included a few tips and tricks and my don’ts that I did.
The Ingredients for Doughnuts
1 cup whole milk
1/4 cup + 1 teaspoon of sugar
1 packet of active dry yeast
4 cups of flour
1/2 teaspoon kosher salt
6 teaspoons of melted butter
2 large eggs
1/2 teaspoon vanilla extract
Vegetable oil for Frying
Glaze
1/4 cup whole milk
2 cups powdered sugar
1/2 teaspoon vanilla extract
Chocolate Frosting
2 cups semi sweet chocolate chips
1 cup heavy cream
Sprinkles (optional)
Directions
Grease a large bowl with cooking spray and set aside.
In a small microwavable bowl add 1 cup of milk and heat until warm (about 40 seconds). Add a teaspoon of sugar and stir until dissolved. Sprinkle yeast over the sugar milk mixture until frothy (about 10 minutes).
In a medium bowl whisk together flour and salt.
In a large bowl whisk together remaining sugar, butter, eggs and vanilla. Pour in yeast mixture. Stir until well combined. Next add the rest of the dry ingredients stirring with mixing spoon until a shaggy dough forms. Transfer dough to a lightly floured surface and knead until elastic (about 5 minutes).
Form into a tight ball then place in oiled bowl and cover with a clean dish towel. Let dough rise in a warm spot in the kitchen until it doubles in size (about an hour).
Line large baking sheet with parchment paper. Punch down dough then transfer to a slightly floured baking surface and roll into a 1/2 inch thick rectangle. Using a doughnut cutter to punch out doughnuts and doughnut holes. Re knead scraps and punch out more doughnuts and doughnut holes. Place onto baking sheet and let rise for another forty minutes.
Glaze
Whisk glaze ingredients until well combined.
Chocolate Frosting
Pour chocolate chips into bowl. Heat cream over medium heat for about 2 minutes until very warm. Pour cream over chocolate and let sit for about 1 minute. Whisk chocolate and cream together.
Frying the Doughnuts
Line large baking sheet with paper towels. In a large dutch oven heat 2 inches of vegetable oil to 350 degrees over medium heat. Cook doughnuts in batches until golden brown (about 1 minute on each side). Transfer doughnuts to paper towels to drain and cool slightly. Add doughnut holes to oil moving turning frequently to ensure each part of the doughnut hole is fried. Transfer to paper towels for draining.
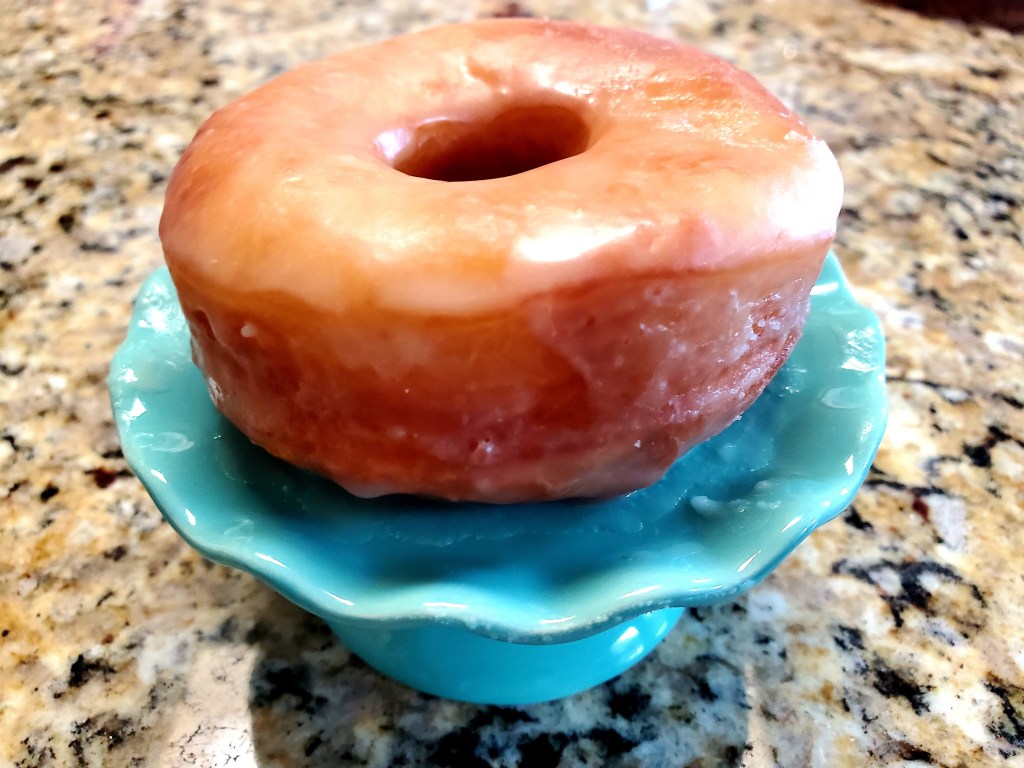
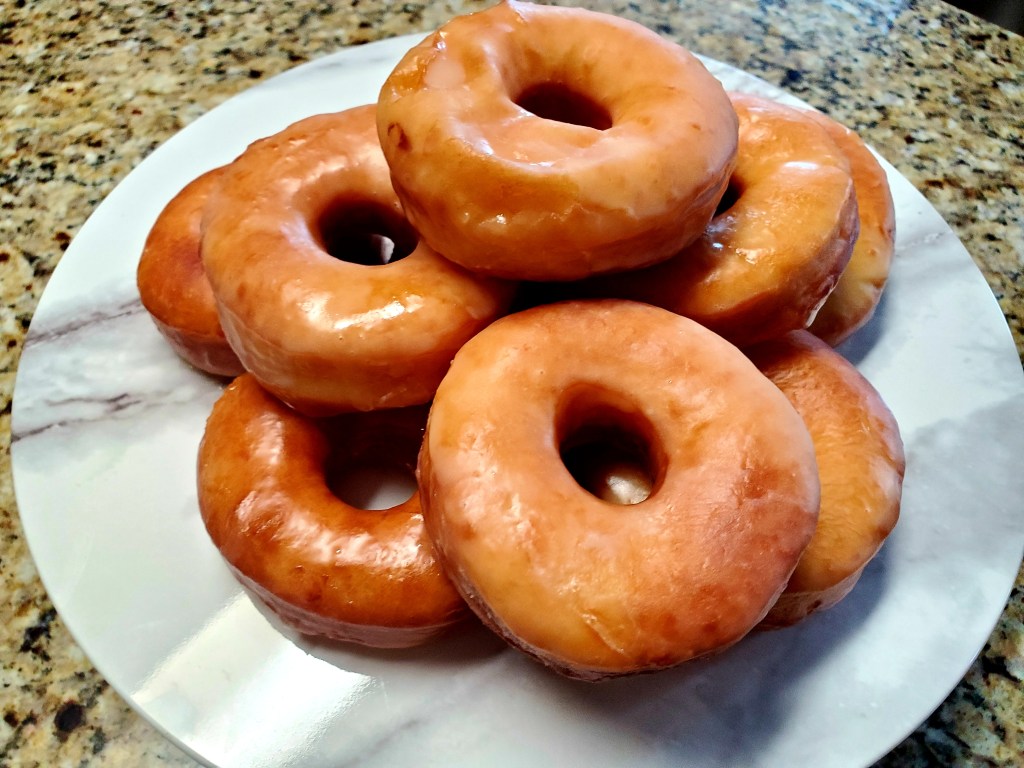
Glazed Doughnuts
Dip doughnuts into glaze while still warm and place on cooling rack.
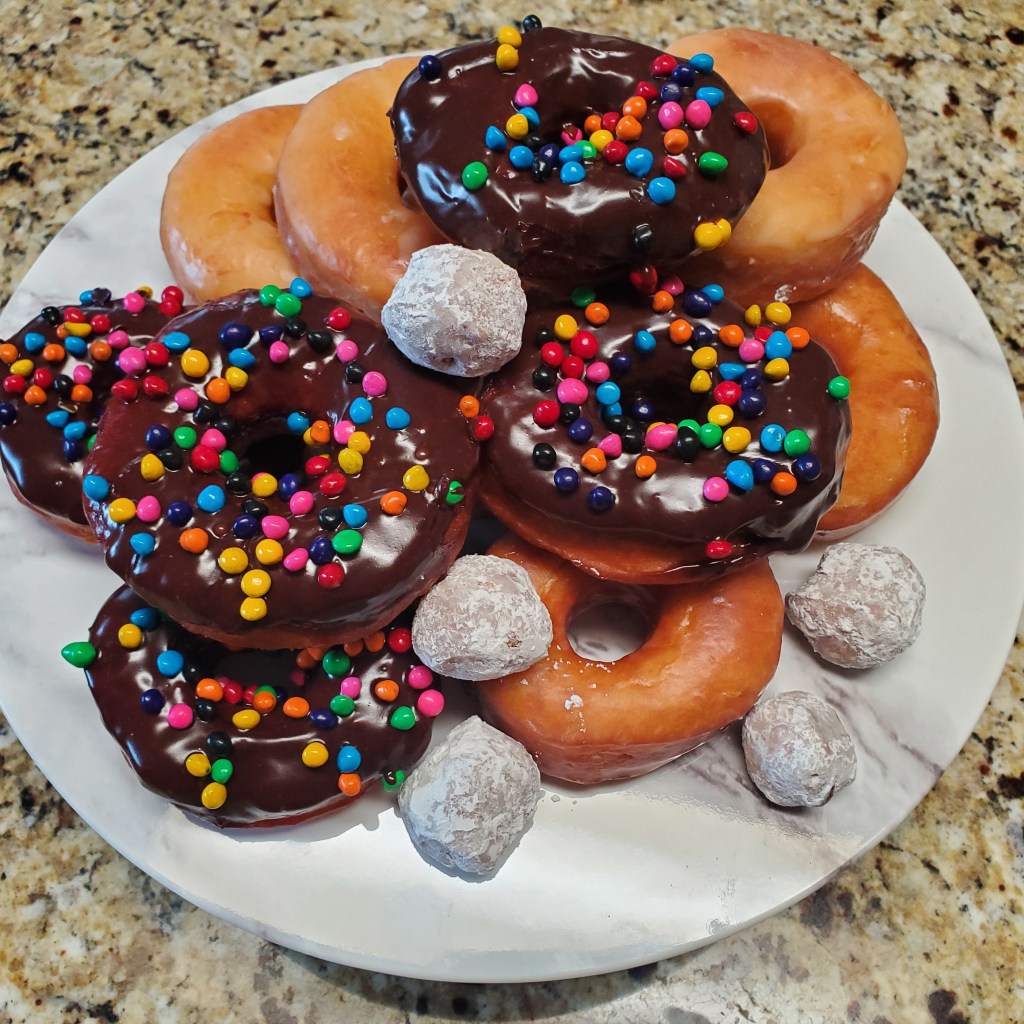
Chocolate Frosted Doughnuts
Dip doughnuts into frosting and add sprinkles (optional).
Doughnut Holes
Place doughnut holes into a bowl with a lid, add 1/2 cup of powered sugar and shake.
Tips, Tricks and a few Don’ts that I did
1. Invest $10 in a doughnut cutter. It’ll save you time and a headache. I’ve included the link to the one I purchased from Amazon below. https://www.amazon.com/gp/product/B07NK3GK2R/ref=ppx_yo_dt_b_asin_image_o00_s00?ie=UTF8&psc=1
2. Don’t be afraid of the yeast. The instructions say to let yeast get frothy once it’s added to the milk. I was afraid my yeast wasn’t frothy enough the first round and ended up throwing out my first batch. I think I expected a frothy explosion and when that didn’t happen I assumed I did something wrong. My next batch of yeast did the same as the first and the doughnuts turned out great. The lesson is… Don’t throw out your yeast just because it’s not as frothy as you think it should be.
3. Proving is way more fun and rewarding than I ever thought it would be. This was the part that made me not want to make conventional fried doughnuts. I’ve watched so many shows where bakes have been under proved and over proved that I was almost too afraid to even attempt these. The truth is proving is still scary, but it’s not hard and the feeling you get when your dough has doubled in size is worth the fear. I will add that you should treat your dough like a baby. Check the temperature, carry it gently in its bowl, make sure it’s warm enough and it will do exactly what it’s supposed to do. Once you lift the towel and see the tiny ball of dough has grown into a much larger “ready to be rolled into 24 doughnuts sized dough” you’ll be glad you did.
4. Keep watching the oil temperature. My last few doughnuts cooked much faster than the first few because the oil got too hot. 350 degrees is the perfect temp for these so try and keep at that as best as you can.
5. The doughnuts are best enjoyed warm. If you’re eating them the day after take the time to pop them in the microwave for 10 seconds and they’ll taste just like they did when you first made them. Have Fun and Enjoy!